一、描述
OpenVAS,即开放式漏洞评估系统,是一个用于评估目标漏洞的杰出框架。功能十分强大,最重要的是,它是“开源”的——就是免费的意思啦~
它与著名的Nessus“本是同根生”,在Nessus商业化之后仍然坚持开源,号称“当前最好用的开源漏洞扫描工具”。最新版的Kali Linux(kali 3.0)不再自带OpenVAS了,所以我们要自己部署OpenVAS漏洞检测系统。其核心部件是一个服务器,包括一套网络漏洞测试程序,可以检测远程系统和应用程序中的安全问题。
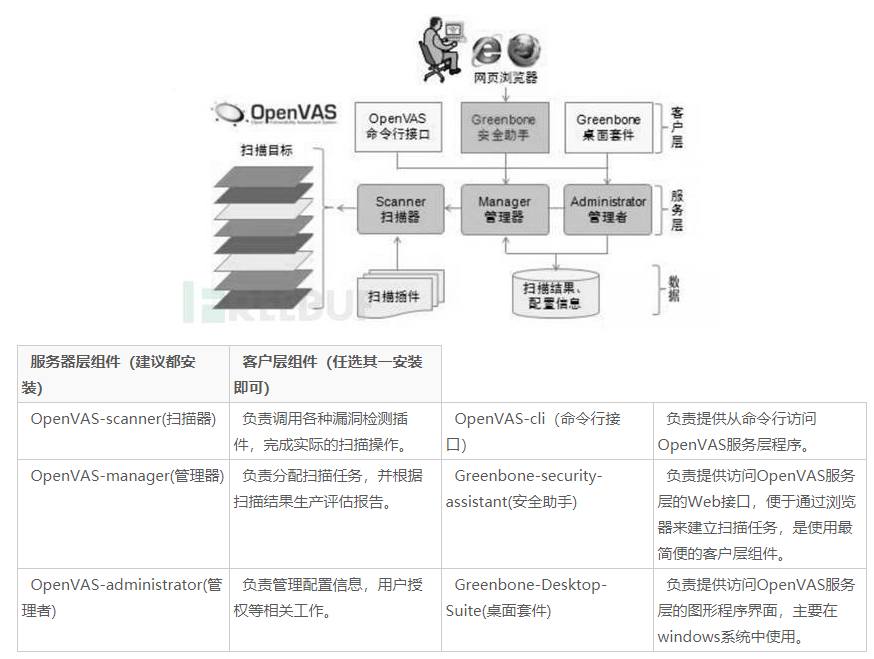
但是它的最常用用途是检测目标网络或主机的安全性。它的评估能力来源于数万个漏洞测试程序,这些程序都是以插件的形式存在。openvas是基于C/S(客户端/服务器),B/S(浏览器/服务器)架构进行工作,用户通过浏览器或者专用客户端程序来下达扫描任务,服务器端负责授权,执行扫描操作并提供扫描结果。
二、OpenVAS系统架构
一套完整的openvas系统包括服务器端和客户端的多个组件,如下图所示:

三、安装部署
1、安装CentOS 7
首先,我首先选择最小的CentOS安装。安装花费的时间更少,文件系统占用的空间更少,我鄙视更新我从未使用过的软件包!下载最新版本的CentOS 7并完成标准安装。如果你虚拟安装OpenVAS,我建议至少2个CPU,3GB内存和30GB硬盘(这取决于扫描次数和你将保留多少数据)。
配置CentOS
如果您启用SELinux,OpenVAS将会访问异常,因此请使用以下命令禁用它。
[root@localhost ~]# sed -i's / = enforcing / = disabled /'/ etc / selinux / config
[root@localhost ~]# setenforce 0
同时打开OpenVAS Web界面的必要端口。
[root@localhost ~]# firewall-cmd --zone = public --add-port = 9392 / tcp --permanent
[root@localhost ~]# firewall-cmd --reload
2、安装OpenVAS
[root@localhost ~]# yum -y install wget net-tools
[root@localhost ~]# wget -q -O - https://www.zhl123.com/download/linux/openvas/atomic | sh
[root@localhost ~]# yum -y install openvas
当yum完成时,使用下面的“sed”命令取消注释/etc/redis.conf文件中的以下2个与unixsocket相关的行。
#unixsocket /tmp/redis.sock
#unixsocketperm 700
[root@localhost ~]# sed -i '/^#.*unixsocket/s/^# //' /etc/redis.conf
启用redis服务
[root@localhost ~]# systemctl enable redis && systemctl restart redis
3、配置OpenVAS
运行openvas-setup并接受rsync作为默认值。这可能需要一段时间,所以要耐心等待
[root@localhost ~]# openvas-setup
-- Output --
Openvas Setup, Version: 3.0

Step 1: Update NVT, CERT, and SCAP data
Please note this step could take some time.
Once completed, this will be updated automatically every 24 hours

Select download method
* wget (NVT download only)
* curl (NVT download only)
* rsync

Note: If rsync requires a proxy, you should define that before this step.
Downloader [Default: rsync]
openvas-check-setup --v9
-- Output --
...
Step 10: Checking presence of optional tools ...
OK: pdflatex found.
WARNING: PDF generation failed, most likely due to missing LaTeX packages. The PDF report format will not work.
SUGGEST: Install required LaTeX packages.
访问OpenVAS Web界面
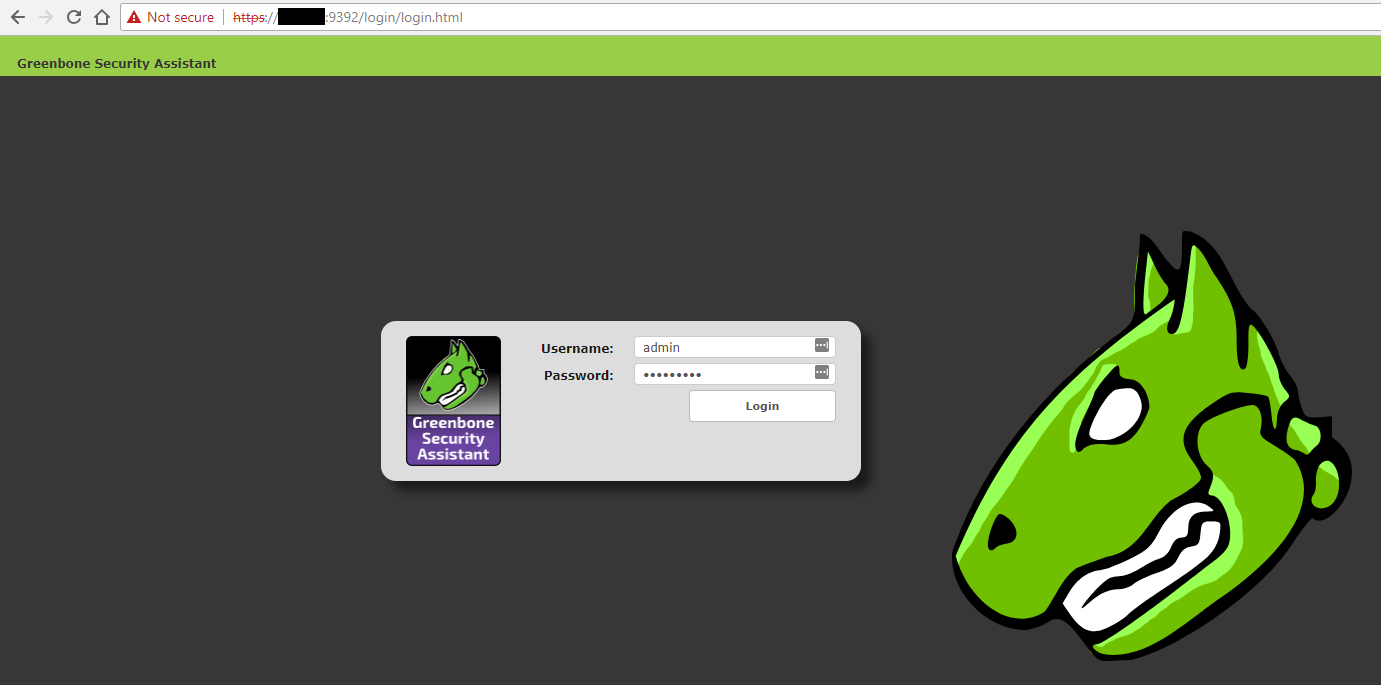
通过访问https:// <您的IP地址>:9392从任何浏览器访问Web界面。

4、配置自动更新Feed
[root@localhost ~]# crontab -e
35 1 * * * /usr/sbin/greenbone-nvt-sync > /dev/null
5 0 * * * /usr/sbin/greenbone-scapdata-sync > /dev/null
5 1 * * * /usr/sbin/greenbone-certdata-sync > /dev/null
5、配置pdf报告输出
[root@localhost ~]# yum -y install texlive-collection-fontsrecommended texlive-collection-latexrecommended texlive-changepage texlive-titlesec
[root@localhost ~]# mkdir -p /usr/share/texlive/texmf-local/tex/latex/comment
[root@localhost ~]# cd /usr/share/texlive/texmf-local/tex/latex/comment
[root@localhost ~]# wget https://www.zhl123.com/download/linux/openvas/comment.sty
[root@localhost ~]# chmod 644 comment.sty
[root@localhost ~]# openvas-check-setup --v9
-- Output --
...
Step 10: Checking presence of optional tools ...
OK: pdflatex found.
OK: PDF generation successful. The PDF report format is likely to work.
